why you need to go for opencart for making an e-commerce site and how to install?

In the world of Internet, we are almost onto our PC. Electronic Commerce otherwise known as E-Commerce is one of them. E-Commerce isn't something very recent and it began in the beginning of ARPANET, where ARPANET used to organize deal between understudies of Massachusetts Institute of Technology and Stanford Artificial Intelligence Laboratory.
Nowadays there are some 100's of E-Commerce sites in the form of Flipkart, Alibaba, IndiaMART, Amazon, and so forth. Have you considered making your own particular Amazon and Flipkart like online Application Server? If it is a YES, this article is for you.
Opencart is an open source E-Commerce Application written in PHP, which can be utilized to build up a shopping cart framework like Amazon and Flipkart. On the off chance that you need to offer your items on the web or need to serve your clients even when you are shut, Opencart is ideal for this. You can make a successful online store, utilizing professional and expert Opencart Application.
OpenCart is a powerful web based business answer for Internet traders giving them the ability to make their own online presence and participate in web-based business at a lesser cost.
installing opencart:
To install OpenCart, you initially need to visit GitHub and download the most recent variant of the software. OpenCart comes as a ZIP document, so subsequently you need to separate the archive's contents inside a folder of your picking.

In the wake of extracting it, you'll notice a folder known as upload and three content documents named install.txt, license.txt, and upgrade.txt.
The install.txt document has installation notes, license.txt includes the GNU General Public License under which OpenCart is released, and upgrade.txt has directions for upgrading a prior rendition of OpenCart to the most recent form in case you're as of now utilizing it. The upload catalog contains the records you have to upload to your web host.
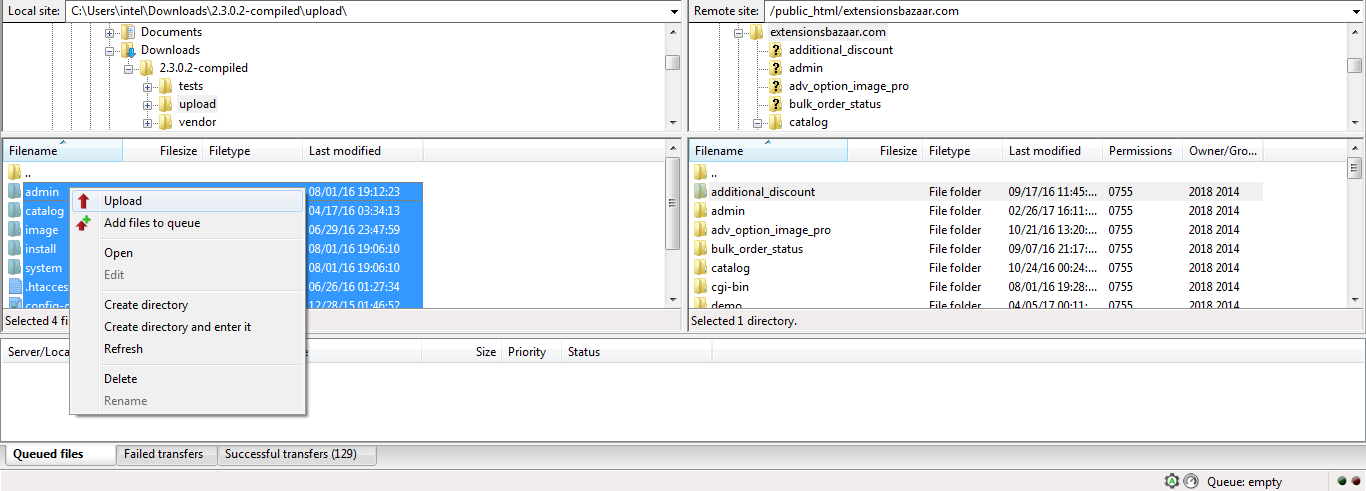
Copy each and every one of the folders and files found in the upload folder to the public directory of your web host. The name of the general population directory may shift contingent upon your host and setup, yet more often than not it is named something like public_html.
In the wake of copying the files, you have to ensure the accompanying files and directories are writable:
To make them writable, ensure the file's authorizations are 666 and directory contents are 777 (rwxrwxrwx). You can try this with the chmod command in the event that you have shell access, or effortlessly through your host's cPanel install.
In order to do this in cPanel, you should simply go to the index that you uploaded your OpenCart documents to, right tap on each of the files and pick "Change Permissions" from the pop-up box. Presently make a MySQL database with a new user created and appended to it.
To create a MySQL database, you'll have to log in to your database backend. In the event that it's a shell, you can then utilize the CREATE DATABASE order and make a user with proper access benefits with GRANT.
In case you're utilizing phpMyAdmin, under Create New Database enter the name of the database you need to make and tap on the Create Button. At that point to join a new user to the recently made database, tap on the Privileges tab at the top and after that tap on the Add New User button. Put in the username, host and your selected password twice. Under the Database then select none alternative. Under Global privileges tap on the check all.
After all this, you ought to open the storefront in a browser to start the installation. The correct URL will rely on upon where you've transferred the documents; for instance, on the off chance that you've uploaded the files to public_html, then you would open your very own domain like www.example.com. In the event that you've made public_files/store and uploaded the documents there, then you would open www.example.com/store.
After you have gone by the URL of where you transferred your OpenCart files, you will be demonstrated the initial step which is "Step 1 – License". All you have to do here is acknowledge the GNU General Public License by ticking "I consent to the License" after which you tap on the proceed button.
Step 2 – Pre-Installation - The pre-installation screen shows all the installation prerequisites, PHP settings as well as the extensions. It would likewise check whether the right consents are set for the directories and files. On the off chance that there are no blunders, you can tap on the continue button.
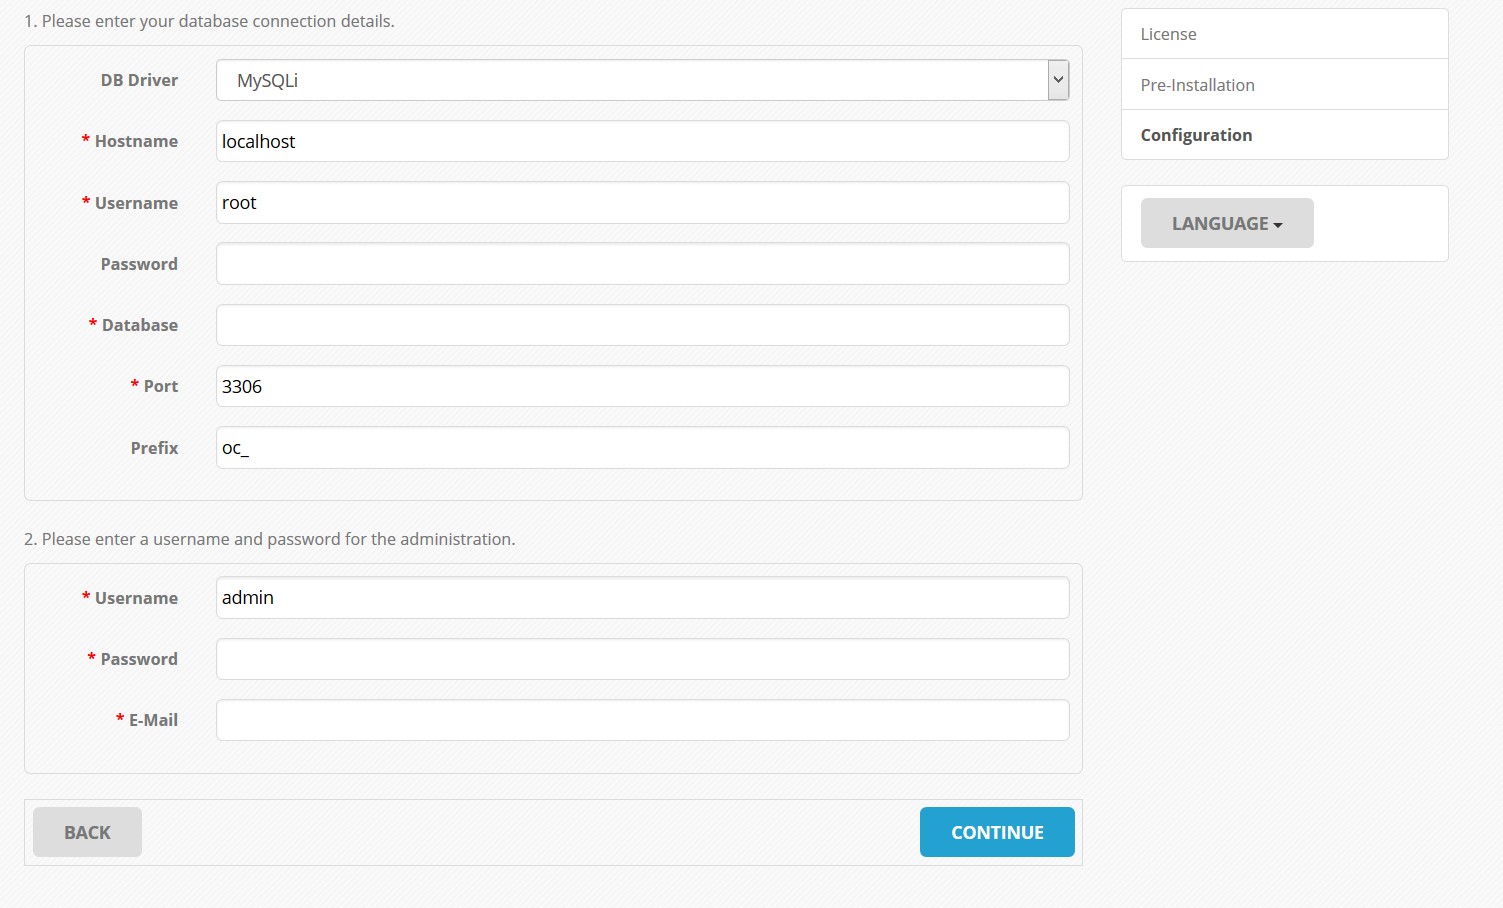
Step 3 – Configuration - This is the place you enter the database host, password and the username of the MySQL client you made before, and the database name.
The following three choices, Username, Password, and Email, are for the administrator account. This is the place you enter the username, secret key, and email address that you will use to login to the regulatory backend.
After you tap on Continue, you'll be demonstrated the last step, "Step 4 – Finished". After this wizard is done, you have effectively installed OpenCart.
After the wizard is finished, you need to delete the install directory from your server.
 Newsletter Subscribe